In the article, set up of the most popular modes is given: RealCOM is a virtual СОМ port for a PC, TCP Client, TCP Server.
Do not confuse NPort with MGate gateways. NPort converts only СОМ interfaces to Ethernet and does not change data, whereas MGate converts both interfaces, and protocols.
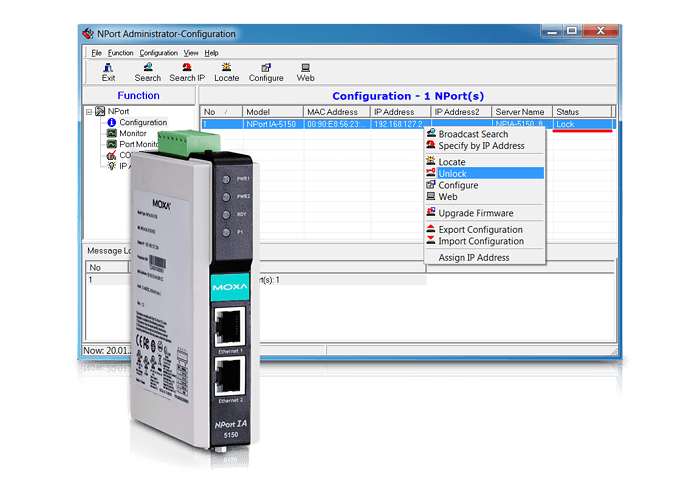
Content:
NPort set up
RealCOM mode
To start working with NPort IA5150 in RealCOM mode, install .
First, set up the NPort, then add a COM port using either a driver, or NPort Administration Suite.
You can watch a short video on how to set up NPort:
If you use driver, then once the NPort set up is completed, you will find a СОМ port in the device manager. If you use NPort Administration Suite to add a COM port, then COM port will not be displayed in the device manager.
Configure NPort into RealCOM mode and add a virtual СОМ port using NPort Administration Suite. You can also use WEB interface for the set up.
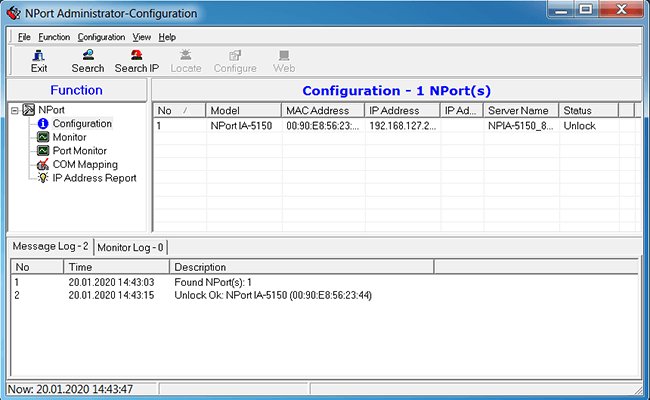
Search for NPort by selecting Configuration field and clicking the Search button.
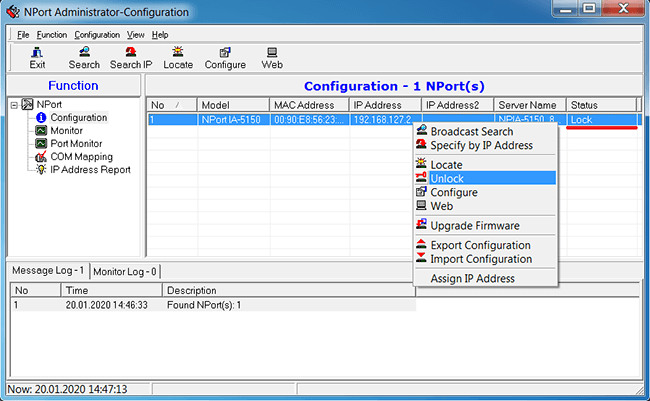
Then unlock NPort: right-click on it, choose Unlock and enter the password fr om the documentation.
Choose the necessary NPort and click Configure.
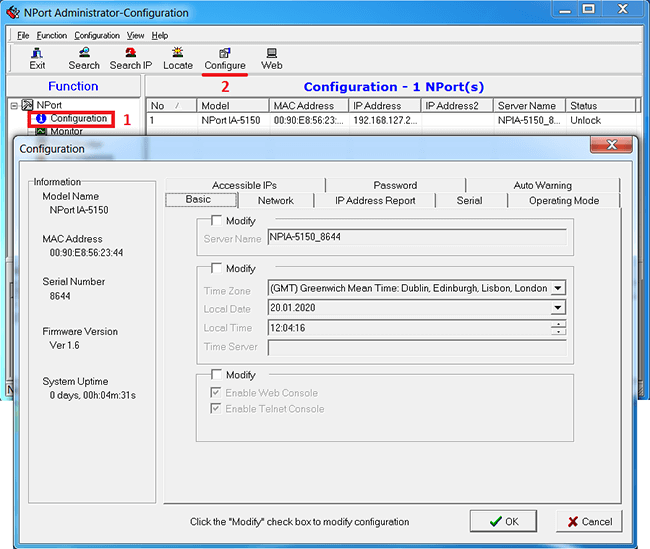
In this window, you can change the NPort settings by checking Modify box.
In Network tab, you can change the NPort IP address.
In Serial tab, the COM port parameters are set: baud rate, interface type, etc.
For RealCOM mode, the COM port baud rate will change automatically after СОМ port is open. For other modes, the correct baud rate should be specified.
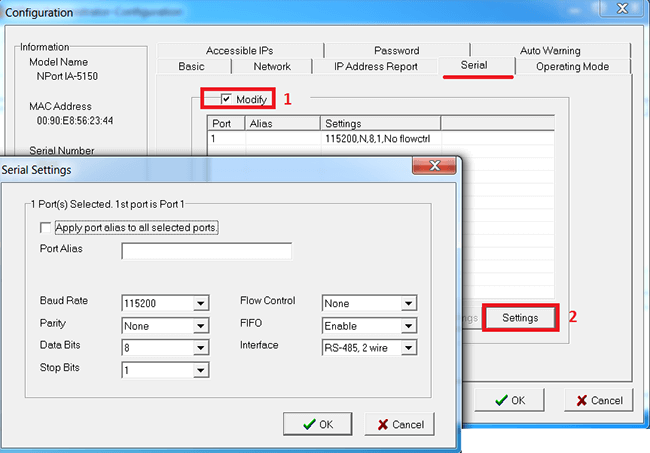
Switch to Operation Mode tab to set up the definite COM port operating mode.
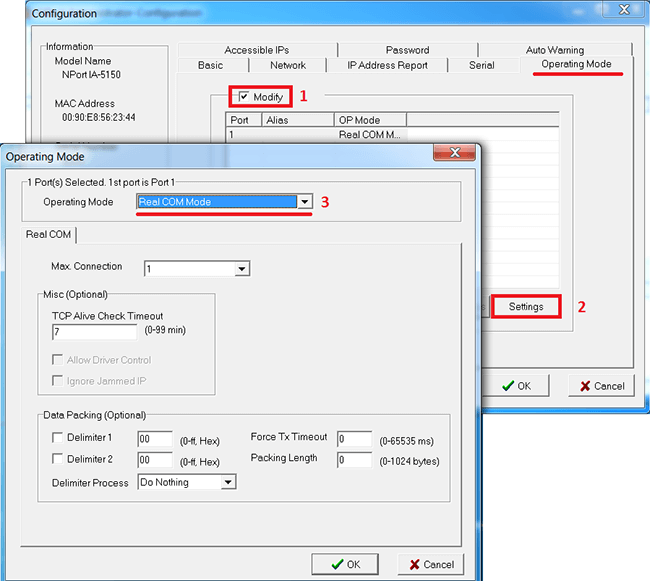
Sel ect RealCOM operating mode, leave other parameters unchanged (by default).
Once the settings are saved, NPort will be reloaded and produce a distinctive sound.
Then, add a virtual COM port to the PC (you can use NPort to do this).
Sel ect COM Mapping field and click the Add button.
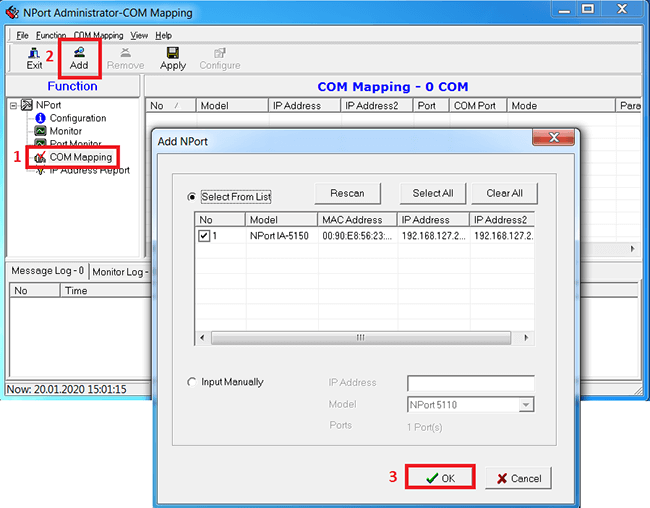
NPort will be displayed with blue font in the program, meaning that the setting parameters have not been saved yet.
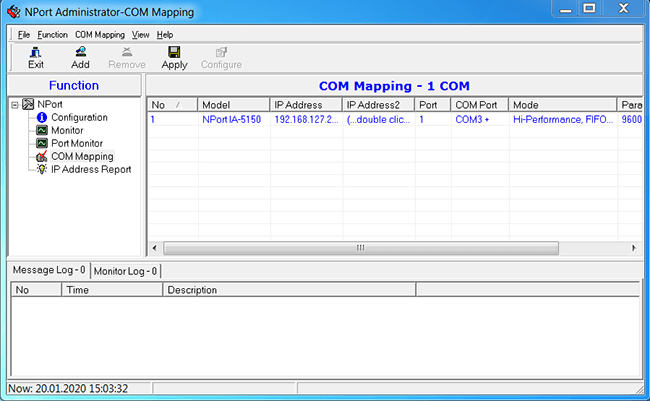
You can change the COM port number by clicking the Configure button.
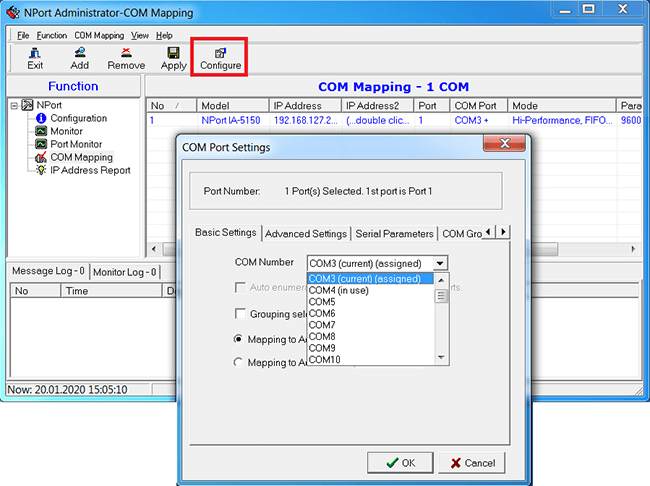
Once all settings are specified, click the Apply button.
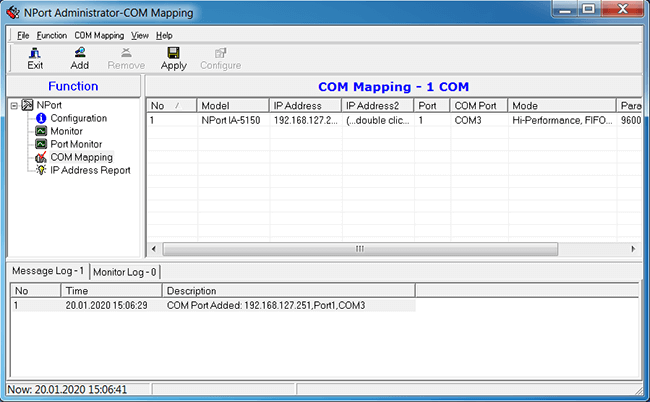
The title font changed to black, meaning that all changes had been saved.
To start working with a COM port, you need a program that allows COM port opening and sending data to it. MOXA offers to use a free tool .
To check the work of NPort, follow the recommendations below.
TCP Client mode
For TCP Client mode, in Serial tab, specify the correct baud rate, as it cannot be set automatically.
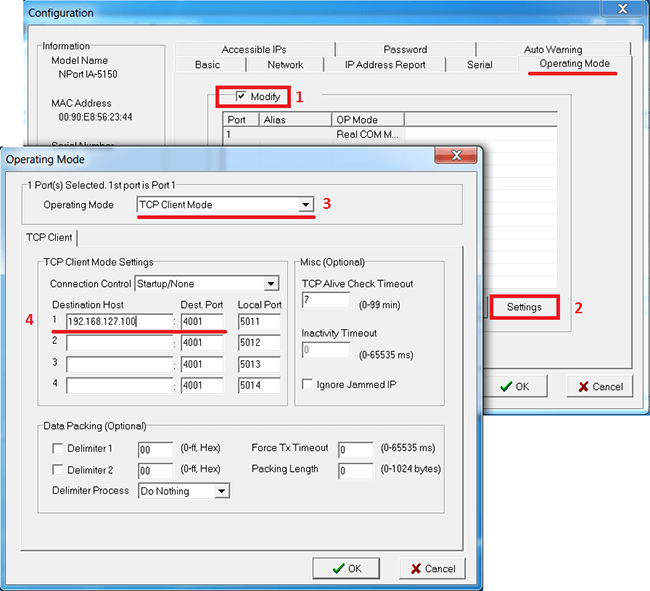
In Operation Mode tab, select the TCP Client mode.
For the correct operation, specify the IP address of the TCP Server of connection and the TCP port. The rest parameters can set by default.
TCP Server mode
For the TCP Server mode, in Serial tab, specify the correct baud rate, as it can not be altered automatically.
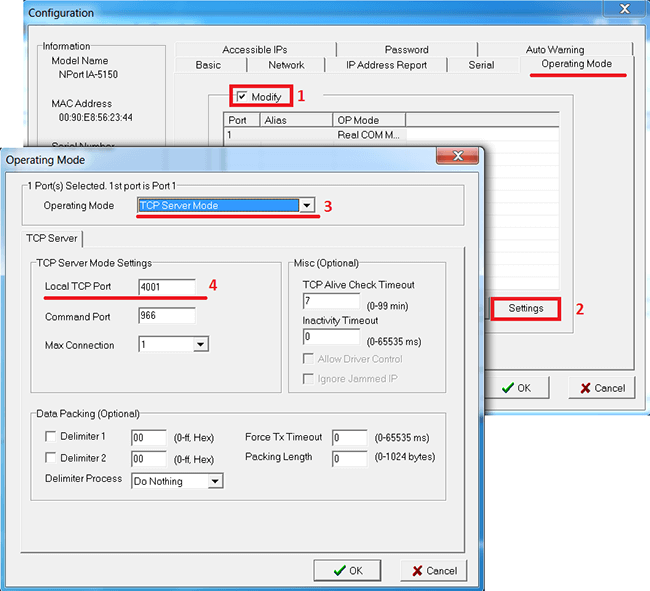
In Operation Mode tab, select the TCP Server mode.
For the correct operation, specify the TCP port, which TCP Client is to be connected to.
The rest parameters can set by default.
How to check, whether NPort is really working?
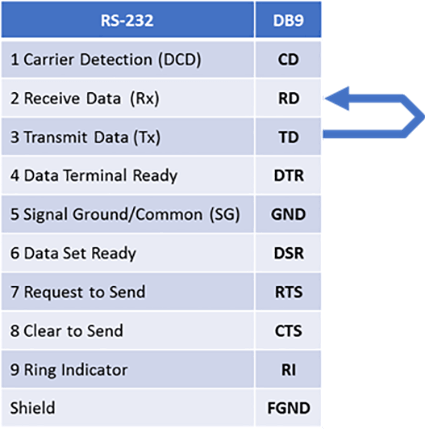
To check RS-232, just make contact between RX and TX, thus creating a loop. All data transmitted to NPort will be returned.
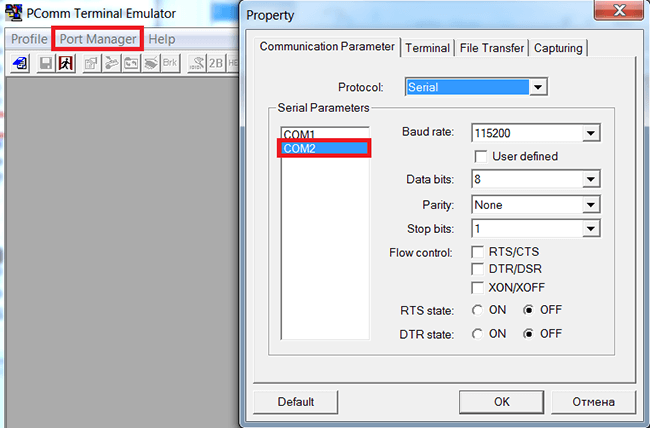
Open , then, in Port Manager tab open a СОМ port, that corresponds to the NPort(in RealCOM mode). You may leave baud rate and other parameters set by default, as the driver will automatically apply the same parameters as for the NPort.
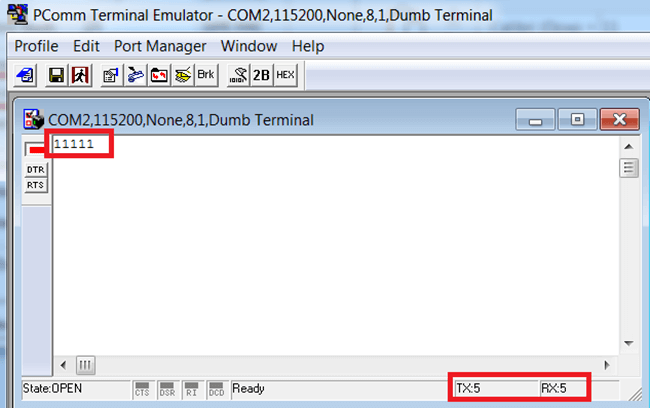
We have sent a number of 1s to the COM port and got them back. We can also see the same value on TX and RX counters, which confirms that the forwarded data has been received.
Pull high/low resistors and terminating resistors
Some NPort models feature built-in resistors that provide the correct operation of RS-422/485 lines.
Terminating resistor for 120 Ohm – must be installed in the beginning and in the end of the line to prevent fr om signal reflection fr om the end of the line and wanted signal distortion in RS-422/485.
Pull high/low resistors – are designed to lim it the current flowing through the signal circuits to make the digital input status either high, or low by default.
NPort IA5150 does not feature built-in resistors, however some models do. Example for other models:

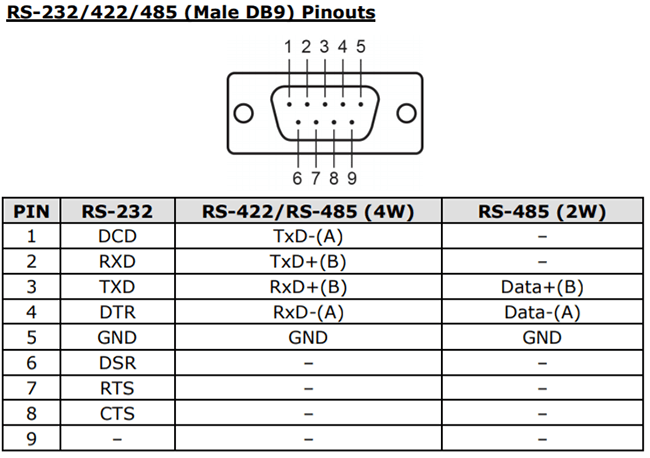
NPort IA5150 pinout diagram

If you have any questions about МОХА products, just contact us e-mail: sales@ipc2u.com

