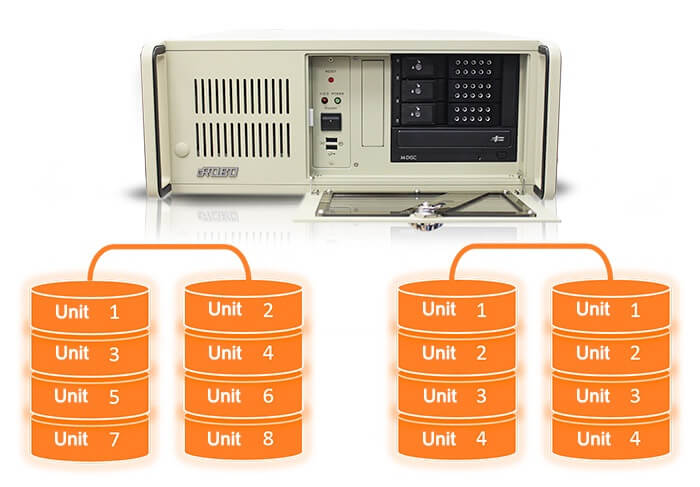
First of all, make sure that the industrial computer's processor board supports RAID technology, or an external PCI / PCI-Express RAID controller device is installed. To create the simplest RAID levels 1 and 0, we need at least two identical HDD or SSD drives.
RAID support is one of the special features of industrial computers and servers, requiring increased reliability. Thanks to the RAID function you can increase system performance or ensure the maintenance of critical information.
The setting of the RAID function (redundant array of independent disks) is performed in almost the same way on most processor boards. For example, let's look at the RAID setting for the iROBO-2000-40i5TRHN-G3 industrial computer model.
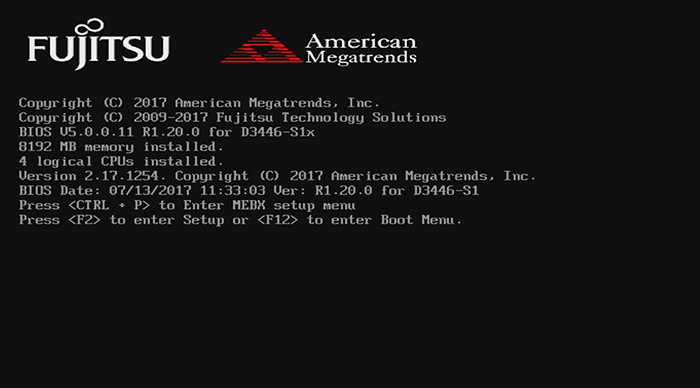
1. After turning on the computer, during the loading of the POST screen, press the «Del» key to enter the BIOS settings.
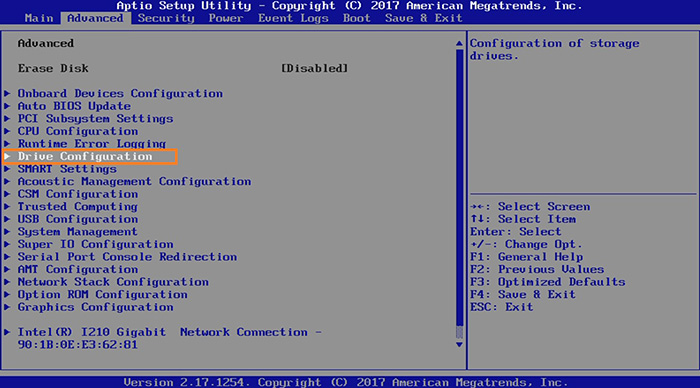
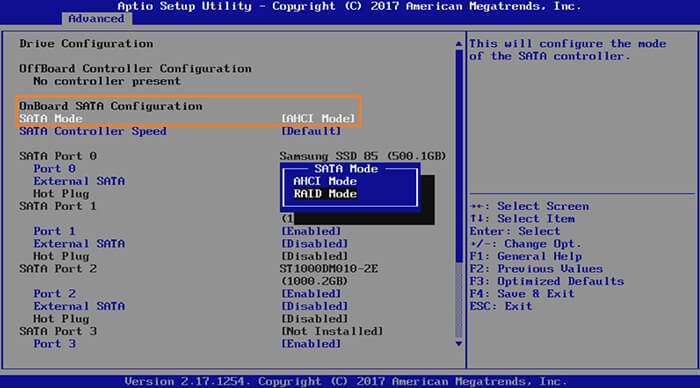
2. Make sure that the BIOS detects all installed hard disks. In the "Advanced" section, enter the "Drive Configuration" subdirectory.
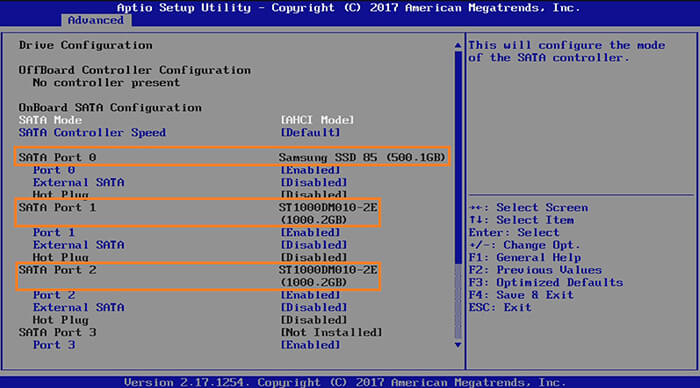
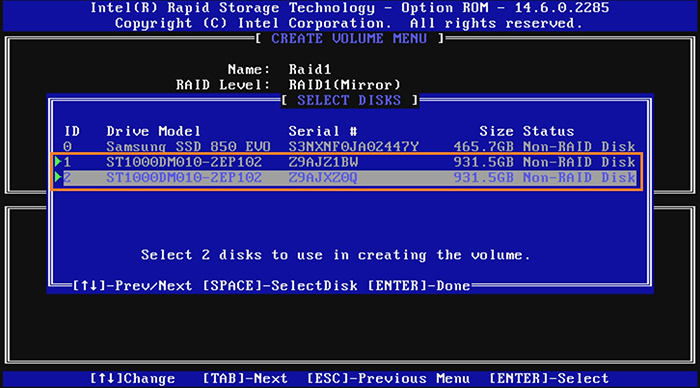
3. In the "Drive Configuration" subdirectory make sure that all disks are recognized by the system. In our case, these are a 500Gb Samsung SSD drive for the operating system and two Seagate 1000Gb HDD drives to create the RAID.
4. To activate the integrated RAID controller, we need to change the SATA Mode from AHCI to RAID. At the end of the settings press F10, save the changes and exit the BIOS.
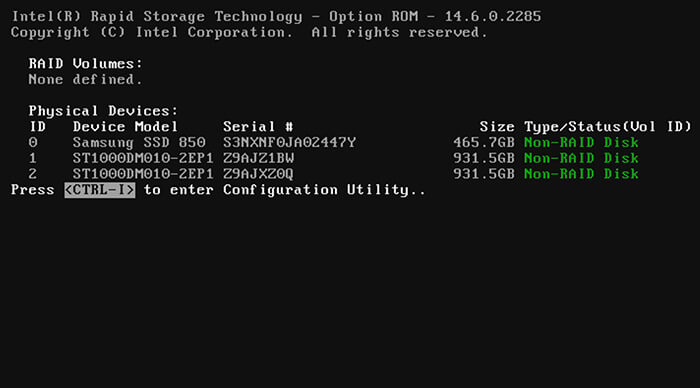
5. After rebooting the system will ask to set the RAID controller. To do this, press Ctrl + I and go to the RAID parameters.
6. In the new directory select Create RAID Volume and create one of the available RAID levels.
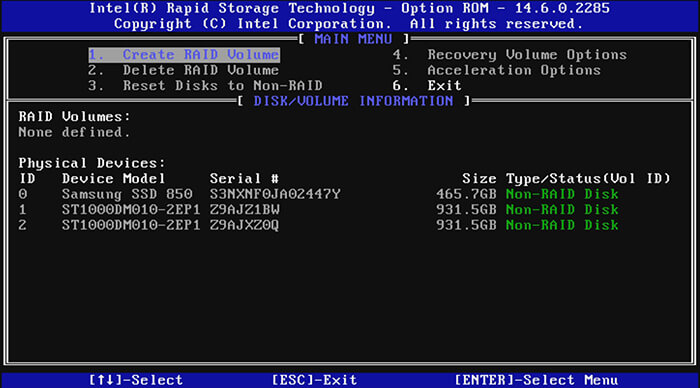
7. Since we only use two drives, levels 0 and 1 are available.
RAID0 allows you to add up the volume and transfer rates of both drives to increase the data read/write speed by 2 times, the "stripe" mode.
RAID1 allows you to adjust the mirroring mode "mirror", in which all information will be duplicated on the second drive for maximum reliability.
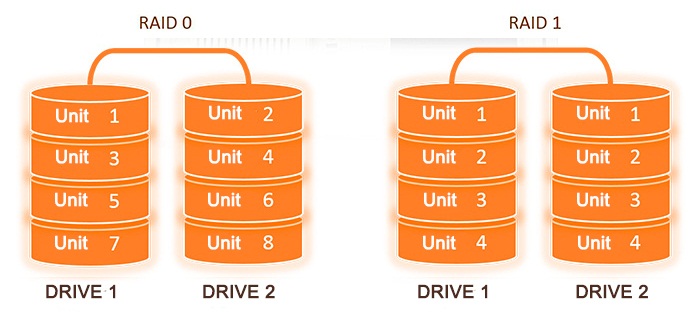
When using more advanced RAID controllers with a large number of drives, it is possible to build complex RAID levels, such as 5, 10, 50, 60, etc. In our case, by assigning a name to the Raid1 array, in the next step we can choose its type.
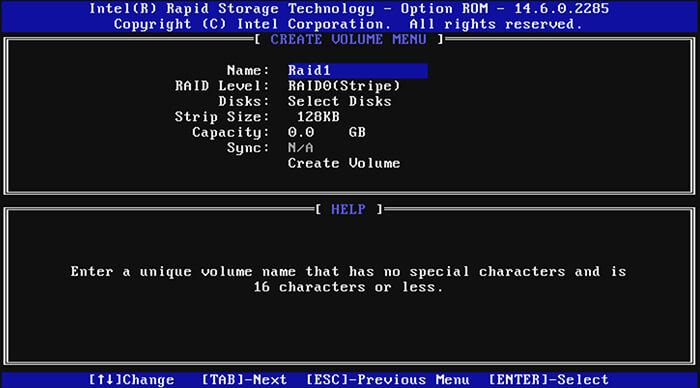
8. We create a RAID 1 (Mirror) array to provide "redundancy" and safeguard critical information.
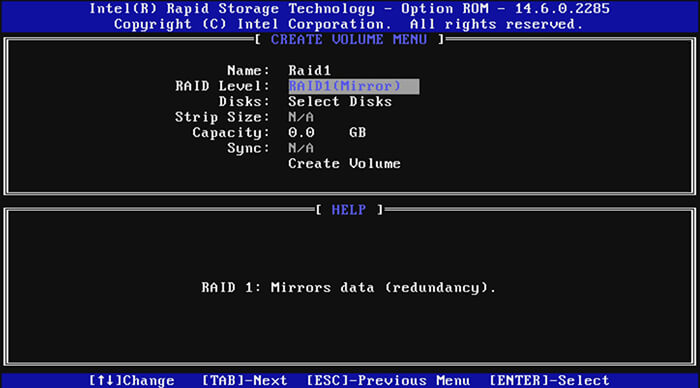
9. After selecting the "Create Volume" item, the system will ask to select the drives that will be used in the RAID array. By using the "space" key check both Seagate HDDs.
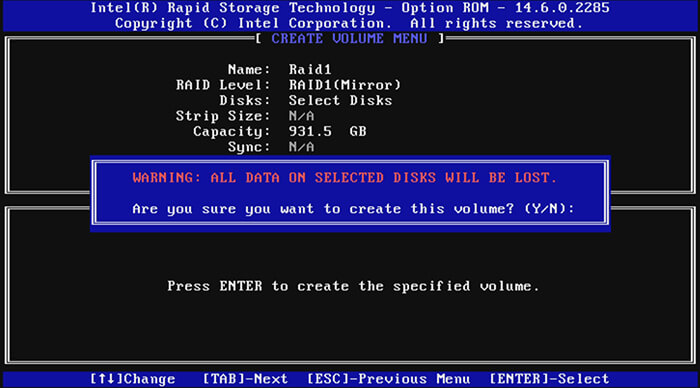
10. When creating a RAID array, all data on the selected drives will be destroyed. Your confirmation should be given by pressing the "Y" key and pressing "Enter".
11. After exiting the RAID controller settings and then rebooting, we will see that our RAID1 is created and it uses both Seagate 1000Gb drives.
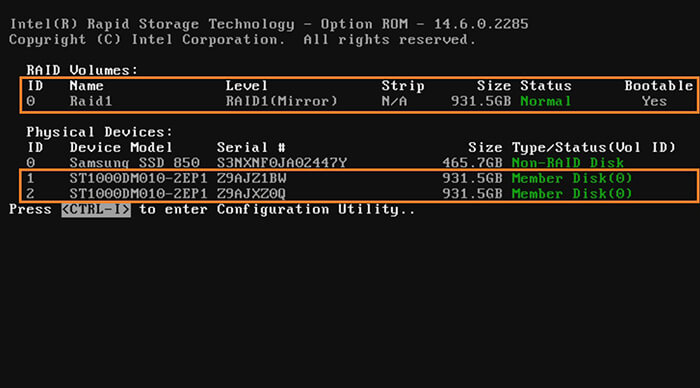
12. Having performed the above actions, the created RAID-array is defined as one logical drive in the BIOS and the operating system. Task completed - RAID1 created!
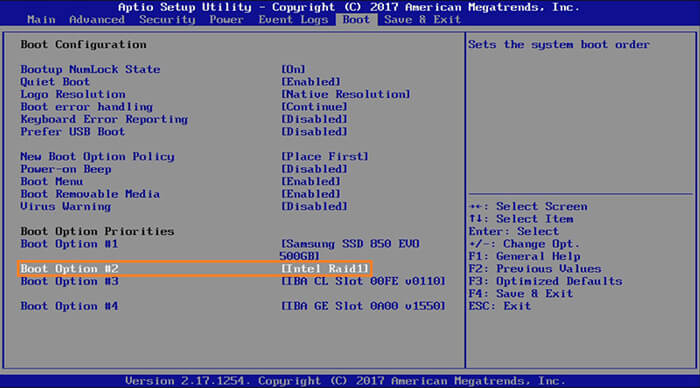
Further actions are carried out in the same way as with conventional drives in terms of installing OS and drivers.
Simple manipulations with the settings above will allow more effectively use of the functionality of industrial computers, increasing the reliability of storage of important information or realizing an increased read/write speed for tasks that require greater consumption of resources
For further information and for the orders please contact our sales team sales@ipc2u.com

